
How to add Password Protection to your Excel documents
For business or sensitive information, it’s important to password product your individual Excel document. Here you can learn how to put a password on your Excel document to protect it.
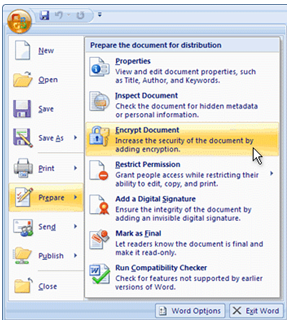
Password protection in Excel is different for versions before Excel 2010, and we will cover both here. To encrypt spreadsheets in versions previous to 2010, begin by clicking the “Office” button. Go to “Prepare” and choose “Encrypt Document”.
After you choose Encrypt, a dialog box is going to pop up. Decide on a fairly strong password. Type it in and click OK. A new dialog will pop up, asking you to confirm your password.

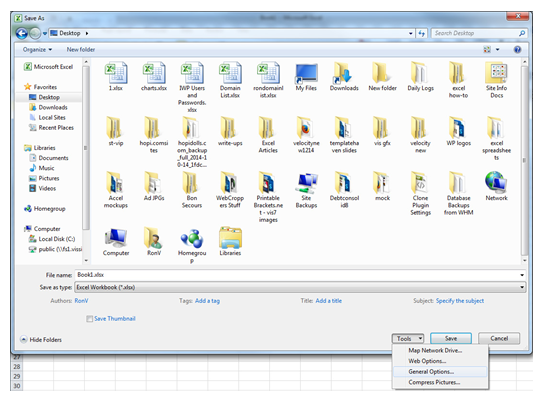
The steps differ for versions later than Excel 2010. Follow these steps to password protect your documents in versions over 2010.
Select “File”, then click “Save As” in the ribbon. Next to the Save button is a Tools menu. Click “Tools”, then click on “General Options”.
Input a password to protect your Excel document in the dialog box. A password will now be required each time you open this document.
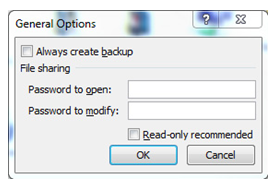
Excel will ask you for the password a few more times to complete the process. Congratulations! You now have a protected Excel document!
Related Templates:
- Excel Autocorrect Guide
- How to Format Data with Excel
- Split Text into Different Cells
- Highlight Rows in Excel
- Password List Sheet
View this offer while you wait!